
There are plenty of good reasons to segregate your networking activities in a virtual machine, especially if you're doing OSInt. Which ones? OpSec, less possibility of contaminating the results, experimentation, ease of sharing the work environment...
While it's true that the ideal scenario is to build your own machine, configuring every single piece of software, it can be convenient to use a pre-built environment designed specifically for this type of activity. There are several interesting alternatives available: Kali, Tsurugi, and Buscador, the subject of this first article.
Buscador 2.0 is distributed by Michael Bazzell via his Blog and you can download it from this page.
It is a very well customized Debian-based VM that saves you the non-trivial effort of having to put together and install all the software you might need in your activities:
| Custom Firefox browser | Metagoofil |
| Custom Chrome Browser | Media Info |
| Tor Browser | Metadata Anylization Toolkit |
| App. to download and manipulate video |
PhoneInfoga |
| Amass | Photon |
| BleachBit | ReconDog |
| EmailHarvester | Recon-NG |
| ExifTool | SkipTracer |
| EyeWitness | SocialMapper |
| Dormouse | Spiderfoot |
| GIMP | StegoSuite |
| Google Earth Pro | SubBrute |
| HTTrack Cloner | Sublist3r |
| InstaLooter | theHarvester |
| KeePassXC | Tinfoleak |
| Cleopatra | Twint |
| Knock Pages | Twitter Exporter |
| LibreOffice | VeraCrypt |
| VLC | |
| Maltego | Yubico Utilities |
Installing the VM
To install it on your computer via VirtualBox you will need:
| VirtualBox 6.0.4 | MD5: | 64530ccb209c38a1c3cbead8b9927ce6 |
| VirtualBox 6.0.4 Extension Pack | MD5: | bb97a7f488ee52cd2a7ae2f48404670a |
| Buscador 2 | MD5: | 09dd771716502771af5f2bb86835e6c2 |
After installing VirtualBox and the Extension Pack, using the “Import” import the .OVA file downloaded from the blog.
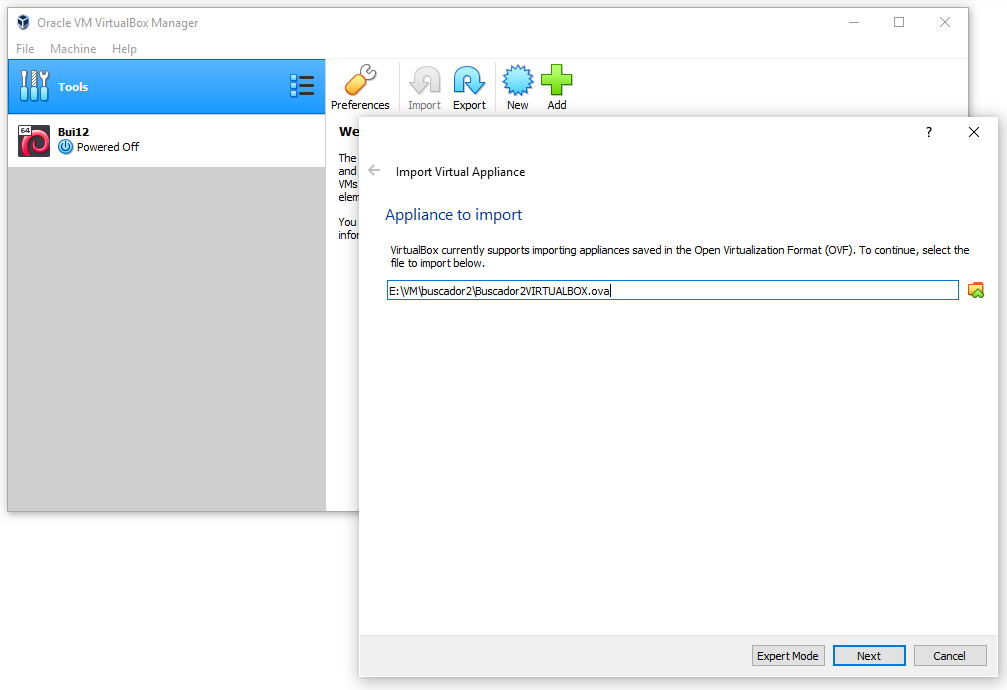
…continue and confirm the import.
Customizing the VM
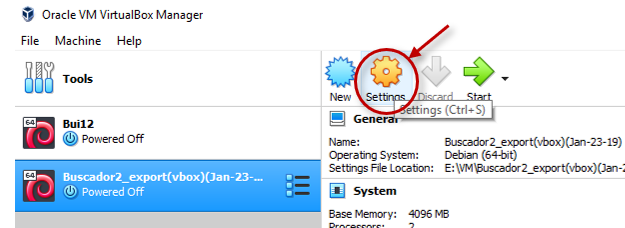
Before starting the VM for the first time you need to customize some settings.
Select the newly imported machine and press “Settings“
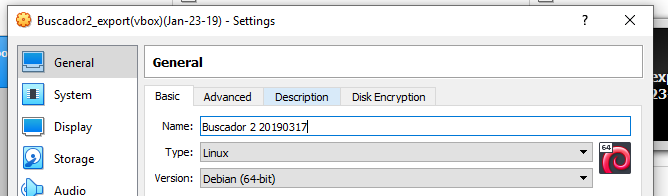
In the entry “Name:” enter the name you prefer, for example Buscador 2. I suggest you also enter a numeric code like 20190317 indicating the date-month-day of the update or customization of the contained software.
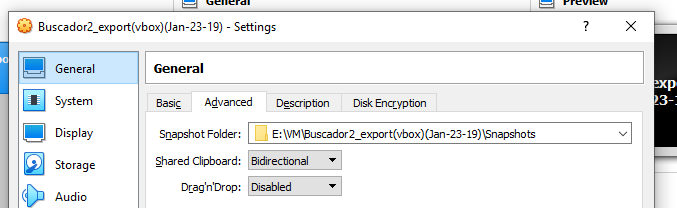
Once you have chosen the name, go to the “Advanced“. Here change the option “Shared Clipboard” from Disable in Bi-Directional. Once this feature is enabled, you can copy and paste between the host machine and the VM and vice versa. This feature is especially useful when you need to copy large amounts of data.
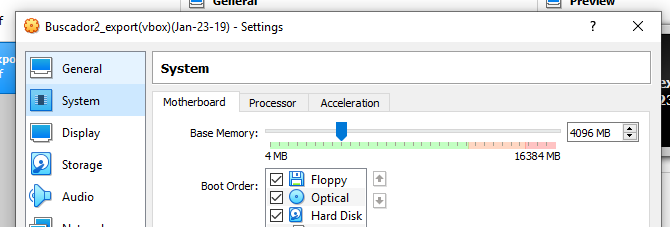
In the section System You can assign more resources to your machine, such as more RAM or more CPU.
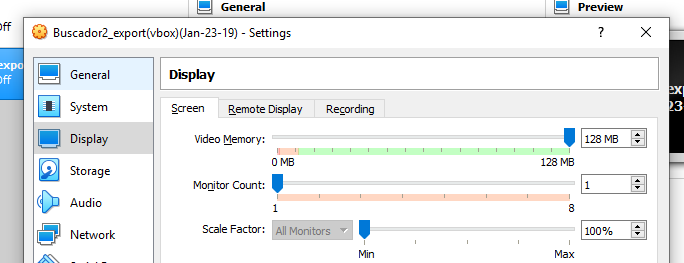
In the card Display I suggest you increase the parameter “Video Memory:” a 128 MB.
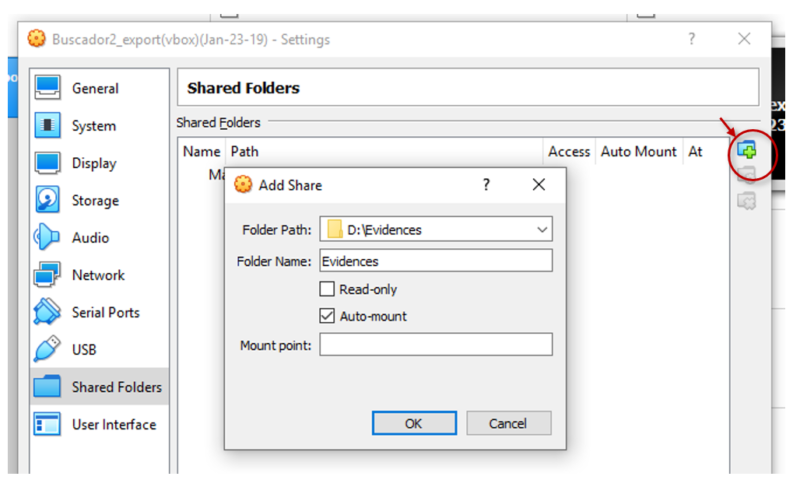
In this final step, we set up the shared folder that we will use to exchange files, data collected by various apps and reports, etc. between the host system and the virtual machine.
In the “Shared Folders” choose the shared folder, in Auto-Mount mode, by clicking on the blue icon on the right side.
In the example I chose to use the folder D: Evidences in mode Auto-mount.
Press OK twice and the virtual machine is ready for first boot.
Installing (optional) Guest Additions.
Let's clarify one thing: below, I use the expression "guest additions must be installed." Some people have pointed out that this approach is perhaps a bit too categorical. Let's just say that their presence will make your life much easier, but if you prefer not to use them, you can safely skip this section.
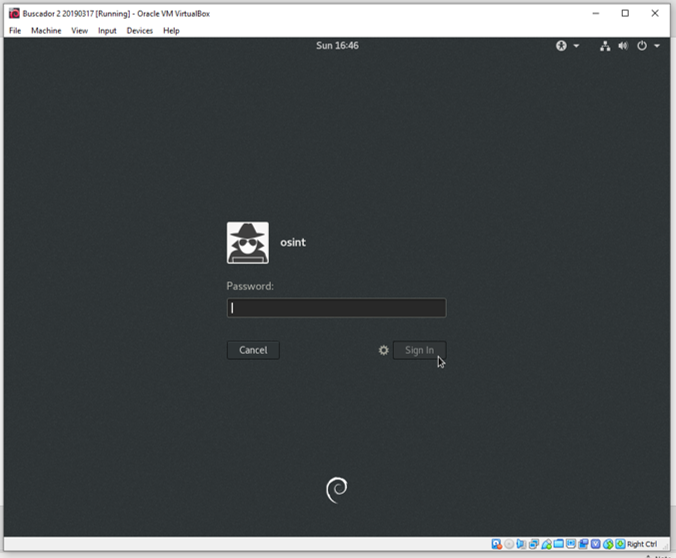
Start the virtual machine using the “Start“. On the home screen you will be presented with only one user osint whose password is osint.
Once logged in, you'll be presented with your user desktop. Before you begin configuring the various tools, you'll need to install the Guest Additions.
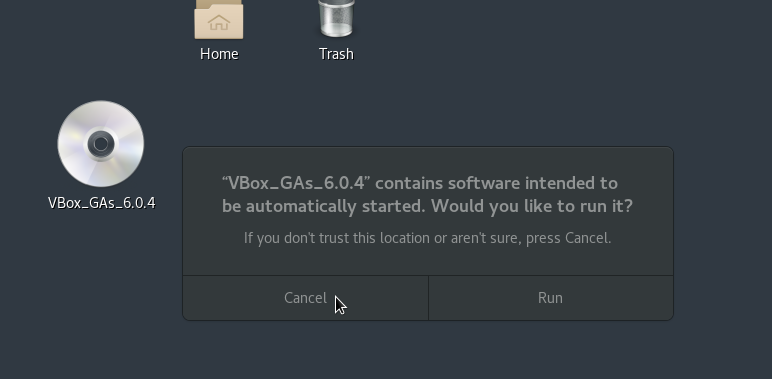
In the menu “Device” select “Guest Additions CD image…“.
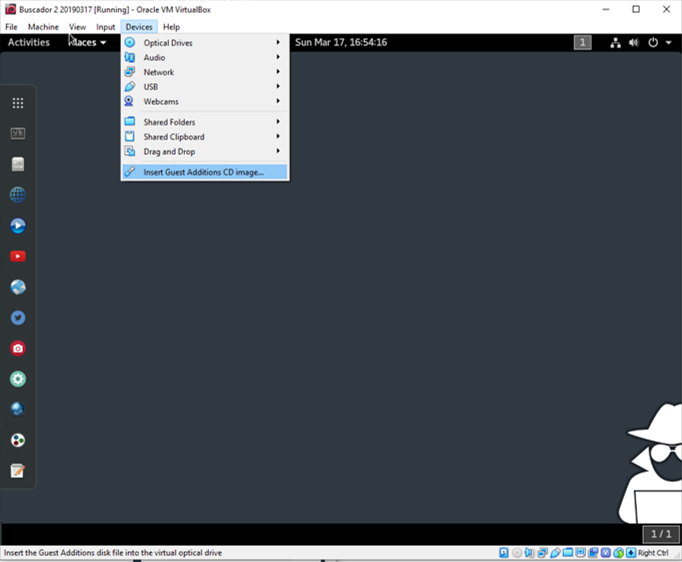
On the next screen press “Cancel“.
Now open Terminal (Tilix).
If it asks you to update, do so! This will also fix the error that appears the first time you launch Tilix.
Create the folder vbox on the desktop using the command:
mkdir ~/Desktop/vbox
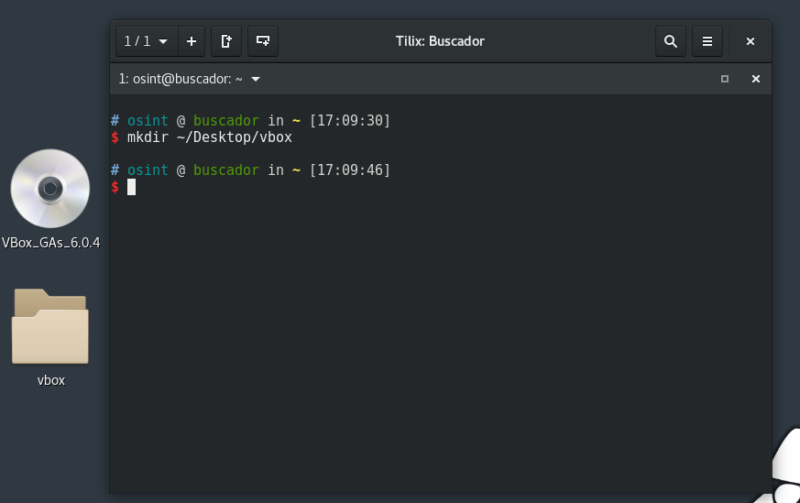
After copying all the contents of the CD into the newly created vbox folder, run the following commands in the terminal:
cd Desktop/vbox

chmod +x *.sh

./autorun.sh
NB during this procedure you will be asked for your user password.
Once the installation is complete, restart the Virtual Machine and log in with the osint user.
Launch Terminal and run this command (you will be prompted for your password):
sudo adduser osint vboxsf
After rebooting, you should be able to access the shared folder via the link on your desktop.
Localization for Europe
Once you've completed the previous procedure, which you can also find a more concise description on Michael Bazzell's blog, it's helpful to localize the virtual machine for Europe. This machine is designed for the US audience, and there are many parameters that need to be modified and adapted to the needs of an analyst working in the Italian theater.
These are fairly simple operations that will be the subject of a future post.
Leave a Reply